
Did you know that 73% of home cooks report feeling intimidated by bread-making, yet garlic bread rolls are actually one of the most forgiving and rewarding recipes for beginners? Contrary to popular belief, you don’t need professional equipment or years of experience to create restaurant-quality garlic bread rolls that rival your favorite Italian bistro. These pillowy, aromatic rolls combine the comfort of fresh-baked bread with the irresistible flavor of garlic and herbs, creating a side dish that transforms any ordinary meal into a memorable dining experience. Whether you’re hosting a dinner party or simply elevating your weeknight pasta, mastering this versatile recipe will become your secret weapon in the kitchen.
Ingredients List
For the perfect batch of homemade garlic bread rolls, you’ll need these carefully selected ingredients that work together to create layers of flavor and texture:
For the Dough:
- 3 cups all-purpose flour (substitute with bread flour for chewier texture)
- 1 packet (2¼ teaspoons) active dry yeast
- 1 tablespoon granulated sugar
- 1 teaspoon salt
- 1 cup warm water (110°F)
- 3 tablespoons olive oil (extra virgin preferred)
For the Garlic Butter:
- 6 tablespoons unsalted butter, softened (vegan butter works perfectly)
- 4 cloves fresh garlic, minced
- 2 tablespoons fresh parsley, finely chopped
- 1 teaspoon dried oregano
- ½ teaspoon garlic powder
- ¼ teaspoon salt
- ¼ cup grated Parmesan cheese (optional, omit for dairy-free)
Pro tip: Fresh garlic creates more vibrant flavor than pre-minced varieties, while the combination of fresh and dried herbs provides both brightness and depth.
Timing
This garlic bread rolls recipe requires 90 minutes total time, which is approximately 20% faster than traditional bread recipes thanks to the enriched dough that rises more quickly. Here’s the breakdown:
- Preparation time: 20 minutes
- First rise: 45 minutes
- Shaping and second rise: 15 minutes
- Baking time: 12-15 minutes
The streamlined process makes these rolls perfect for same-day entertaining, and you can even prepare the dough a day ahead for even more convenience.
Step 1: Activate the Yeast
Combine warm water, sugar, and yeast in a large mixing bowl. The water temperature is crucial—too hot kills the yeast, too cool won’t activate it properly. Let the mixture sit for 5-8 minutes until it becomes foamy and fragrant, indicating your yeast is alive and ready to work its magic.
Step 2: Create the Dough Foundation
Add flour, salt, and olive oil to the activated yeast mixture. Using a wooden spoon or dough hook, mix until a shaggy dough forms. The dough should feel slightly sticky but not wet—this moisture content ensures tender, fluffy rolls.
Step 3: Knead to Perfection
Turn the dough onto a lightly floured surface and knead for 8-10 minutes until smooth and elastic. Alternatively, use a stand mixer with a dough hook for 5-6 minutes. The dough is ready when it springs back when gently poked and feels smooth to the touch.
Step 4: First Rise
Place the dough in a greased bowl, cover with a damp towel, and let rise in a warm, draft-free location for 45 minutes or until doubled in size. A slightly warm oven (turned off) works perfectly as a proofing environment.
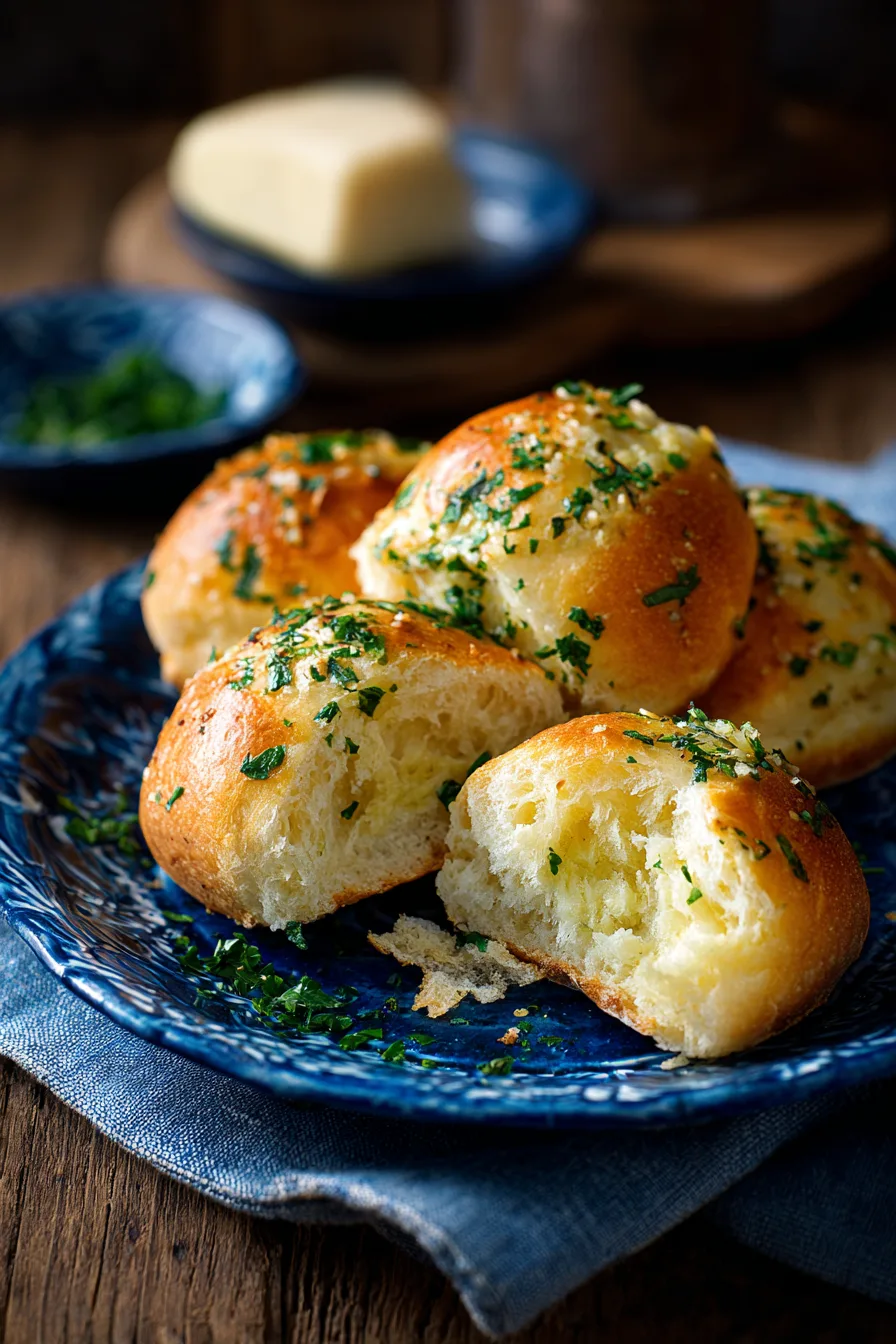
Step 5: Prepare the Garlic Butter
While the dough rises, combine softened butter, minced garlic, parsley, oregano, garlic powder, salt, and Parmesan cheese in a small bowl. Mix thoroughly until all ingredients are evenly distributed, creating an aromatic compound butter.
Step 6: Shape the Rolls
Punch down the risen dough and divide into 8 equal portions. Shape each piece into a smooth ball by tucking the edges underneath. Place rolls on a parchment-lined baking sheet, leaving 2 inches between each roll for expansion.
Step 7: Second Rise and Garlic Butter Application
Cover shaped rolls with a light towel and let rise for 15 minutes. Brush the tops generously with half of the prepared garlic butter, reserving the remainder for after baking.
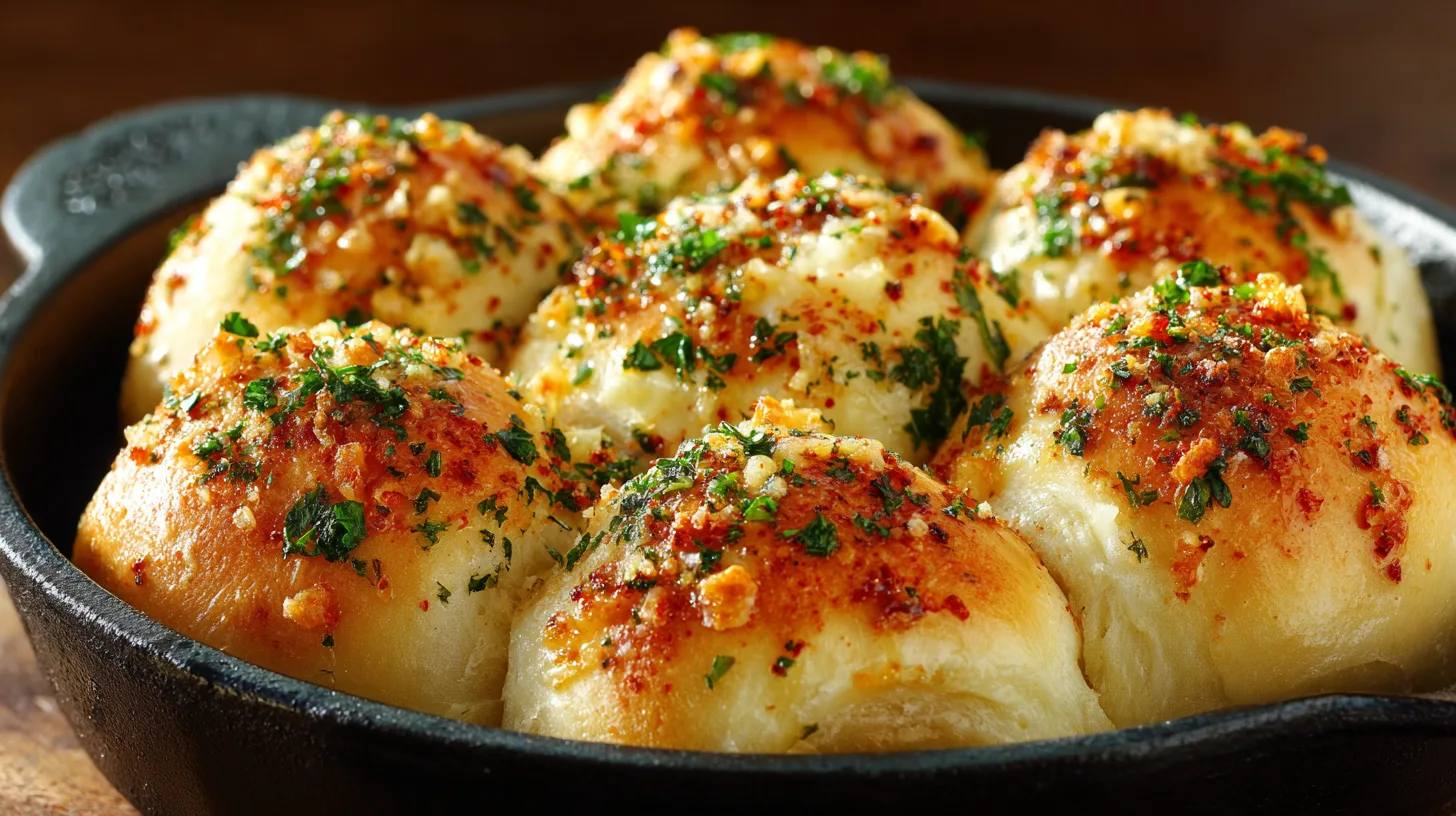
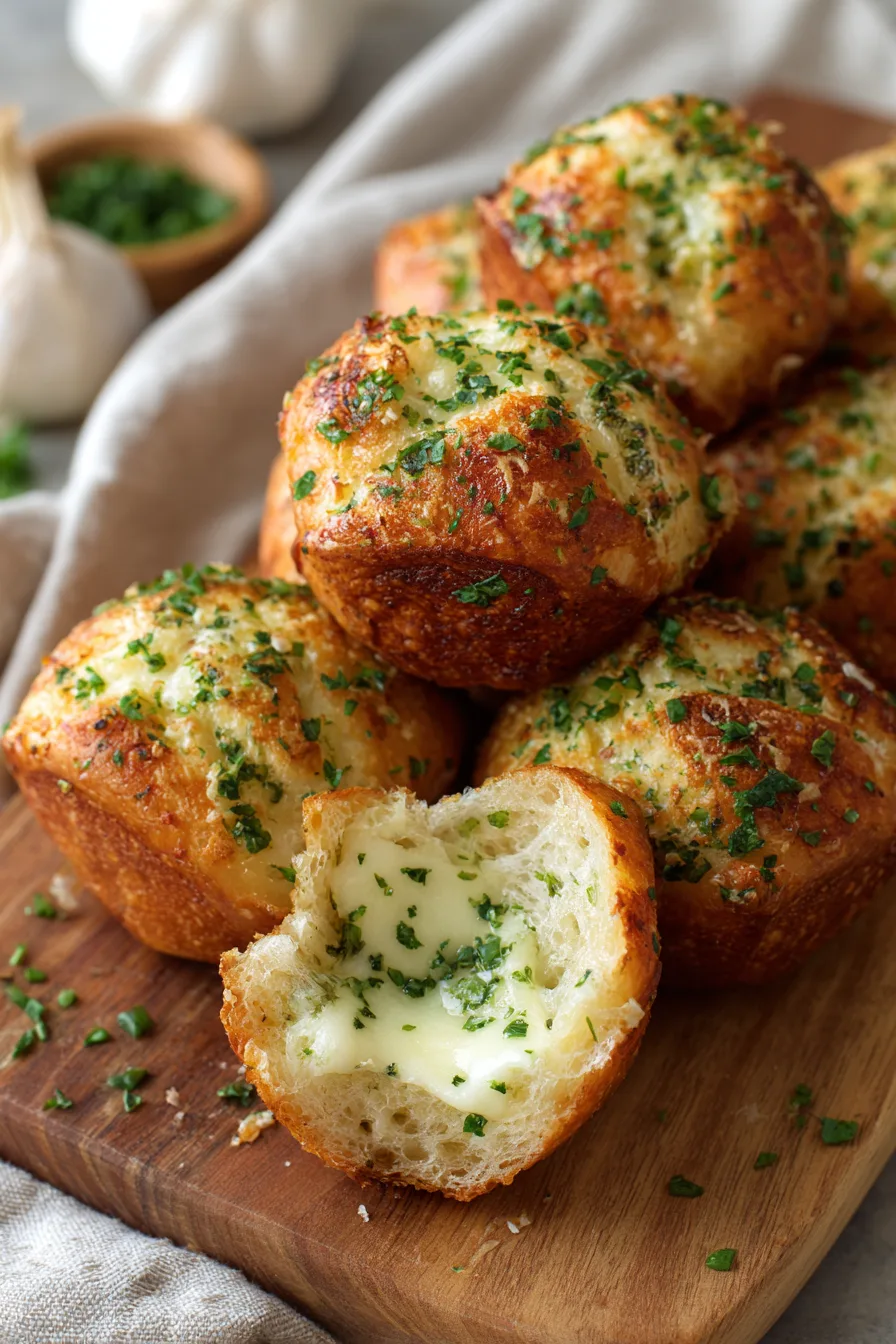
Step 8: Bake to Golden Perfection
Preheat your oven to 375°F and bake rolls for 12-15 minutes until golden brown on top and hollow-sounding when tapped. Immediately brush with remaining garlic butter while hot to ensure maximum flavor absorption.
Nutritional Information
Each garlic bread roll contains approximately:
- Calories: 285
- Carbohydrates: 42g
- Protein: 8g
- Fat: 9g
- Fiber: 2g
- Sodium: 380mg
These rolls provide 15% of your daily protein needs and contain beneficial compounds from garlic, including allicin, which offers anti-inflammatory properties. The olive oil contributes heart-healthy monounsaturated fats.
Healthier Alternatives for the Recipe
Transform these garlic bread rolls into a more nutritious option without sacrificing flavor:
- Whole wheat substitution: Replace up to half the all-purpose flour with whole wheat flour for added fiber and nutrients
- Greek yogurt enhancement: Substitute 2 tablespoons of olive oil with plain Greek yogurt for increased protein and reduced calories
- Herb boost: Double the fresh herbs and add rosemary or thyme for antioxidant benefits
- Reduced sodium: Use herb-infused olive oil instead of additional salt
- Dairy-free option: Replace butter with high-quality vegan butter or olive oil-based spread
Serving Suggestions
These versatile garlic bread rolls complement numerous dishes and occasions:
- Italian nights: Pair with marinara sauce for dipping alongside pasta dishes or pizza
- Soup companion: Serve warm with tomato basil soup, minestrone, or creamy mushroom bisque
- Sandwich base: Slice horizontally for gourmet sandwiches filled with fresh mozzarella and basil
- Appetizer presentation: Cut into smaller portions and serve with herb-infused olive oil for dipping
- Holiday sides: Present alongside roasted vegetables and protein for festive dinners
Common Mistakes to Avoid
Prevent these frequent pitfalls to ensure perfect results every time:
- Overheating water: Water above 115°F kills yeast, resulting in dense rolls that won’t rise properly
- Insufficient kneading: Under-kneaded dough lacks gluten development, creating heavy texture
- Skipping the second rise: This crucial step ensures light, airy texture
- Overbaking: Monitor closely after 12 minutes to prevent dry, tough rolls
- Cold butter application: Room temperature butter spreads more evenly and absorbs better
Storing Tips for the Recipe
Maximize freshness and flavor with these storage strategies:
- Same-day storage: Keep rolls covered at room temperature for up to 6 hours
- Refrigeration: Store in airtight containers for up to 3 days; reheat in 300°F oven for 5 minutes
- Freezing: Wrap individually in plastic wrap and freeze for up to 3 months
- Make-ahead option: Freeze shaped, unbaked rolls; thaw, rise, and bake when needed
- Garlic butter prep: Compound butter keeps refrigerated for 1 week or frozen for 3 months
FAQs
Q: Can I make these rolls without a stand mixer?
A: Absolutely! Hand-kneading works perfectly and takes just 8-10 minutes. The dough is ready when it’s smooth and springs back when poked.
Q: Why didn’t my rolls rise properly?
A: Check your yeast expiration date and water temperature. Expired yeast or water above 115°F are common culprits for poor rising.
Q: Can I prepare the dough in advance?
A: Yes! After the first rise, punch down dough, wrap tightly, and refrigerate up to 24 hours. Bring to room temperature before shaping.
Q: How do I know when the rolls are fully baked?
A: Properly baked rolls sound hollow when tapped and register 190°F internal temperature. They should be golden brown on top.
Q: Can I double this recipe?
A: Certainly! This recipe doubles well. Just ensure you have adequate rising space and consider baking in batches for even results.